How to setup IMAP email account in iPad
1. From the Home screen, tap Settings -> Mail -> Add Account.
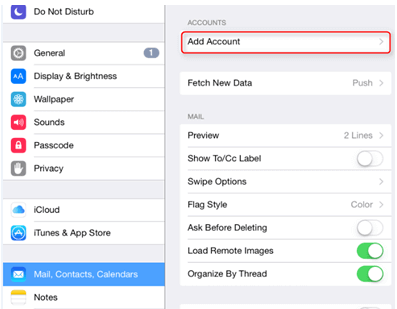
2. To set up an IMAP account of your domain email address, tap Other.
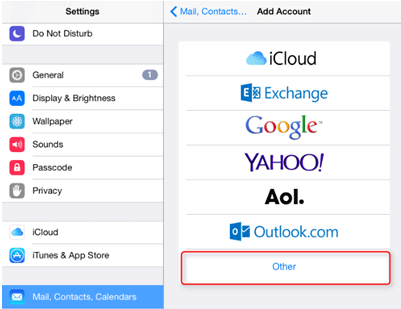
3. Tap on Add Mail Account.
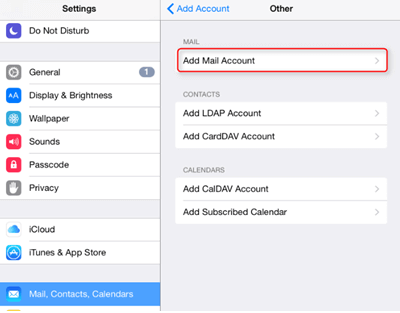
4. Enter your Name, Email, Email Password, and Description, tap Next.
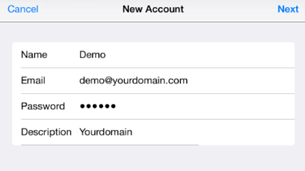
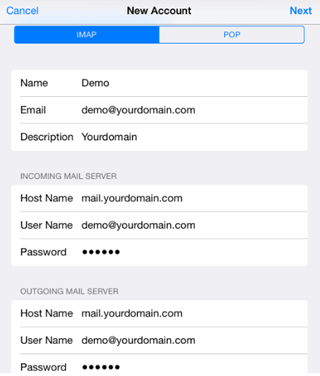
5. Make sure IMAP is selected. Fill up all the required details by referring to the sample below and tap next.
6. Wait for the account to be verified.
7. Select if you want to sync mail and notes. Tap Save.
8. Go back to HOME screen -> Settings -> Mail, Contacts, Calendars -> Tap (the email account you have set up earlier) to check IMAP and SMTP (outgoing mail server) settings.
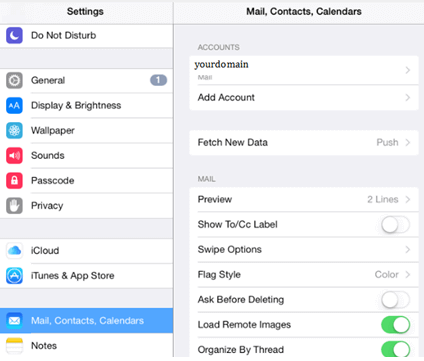
9. Tap on the email account that you have just added.
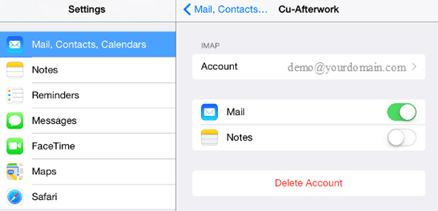
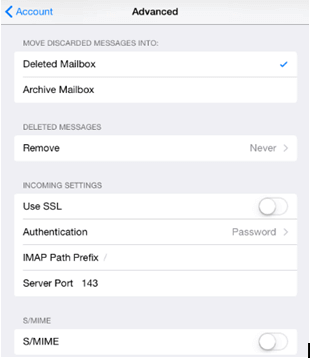
10. Check and verify on the mail setting as below. Next, tap on Advanced.
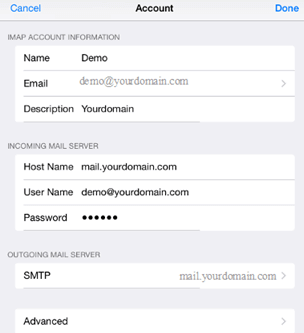
11. Check your SMTP SSL: off (enable it if your webmail comes with SSL), Authentication: Password, Server Port number: 143 (if you choose SSL you will need to set Server Port as 993 for SMTP). After confirm, tap on Account to go back to the previous setting page.
12. Your iPad is now configured to send and receive your domain email.
Check out the next article about how to configure an IMAP account in Microsoft Office 2016. For more information about Email Hosting, kindly visit our site Knowledge Base.

