
VPS
Linux VPS
Windows VPS
OpenVZ VPS
Forex VPS Hosting
Dedicated Hosting
Hosting
Web Hosting
WordPress Hosting
Windows Hosting
Web Hosting For Agencies
Use Cases
Hosting Solutions
Linux VPS
Windows VPS
OpenVZ VPS
Dedicated Servers
Server Deals
Cloud Backup
Servers For Agencies & Reseller
Resources
Rent-A-Server
Cloud
Data Center Designer
Customer References
Cloud Solutions
Compute Engine (IaaS)
Managed Kubernetes
Backup
Our Strengths
Data Backup & Disaster Recovery
Digitalization for SMEs
On-Premise vs Cloud Computing
Domains
Domain Names
Domain Transfer
SSL
SSL Certificate
Company
About Us
Data Centers
Personal Consultant
Website Checker
Favicon Generator
SEO Checker
Whois Lookup
SSL Checker
IP Address Checker
Domain Check
Partner Programs
Partner Program
Affiliate Program
Partner Network
Referral Program

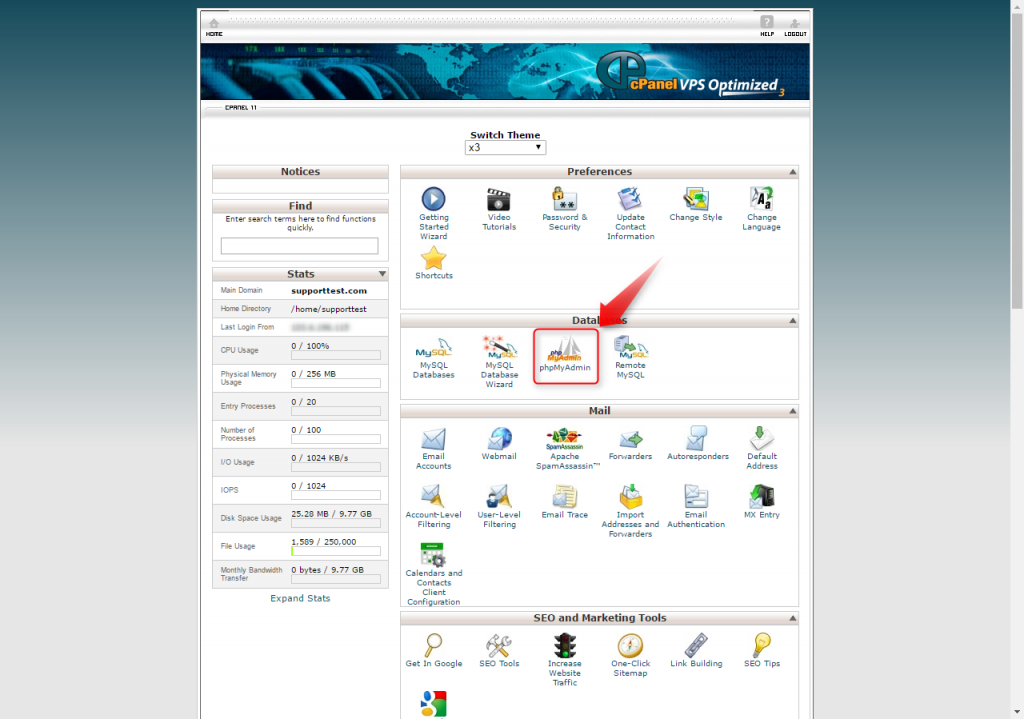
1. Go into the cPanel, look for the Databases section and click the phpmyadmin link.
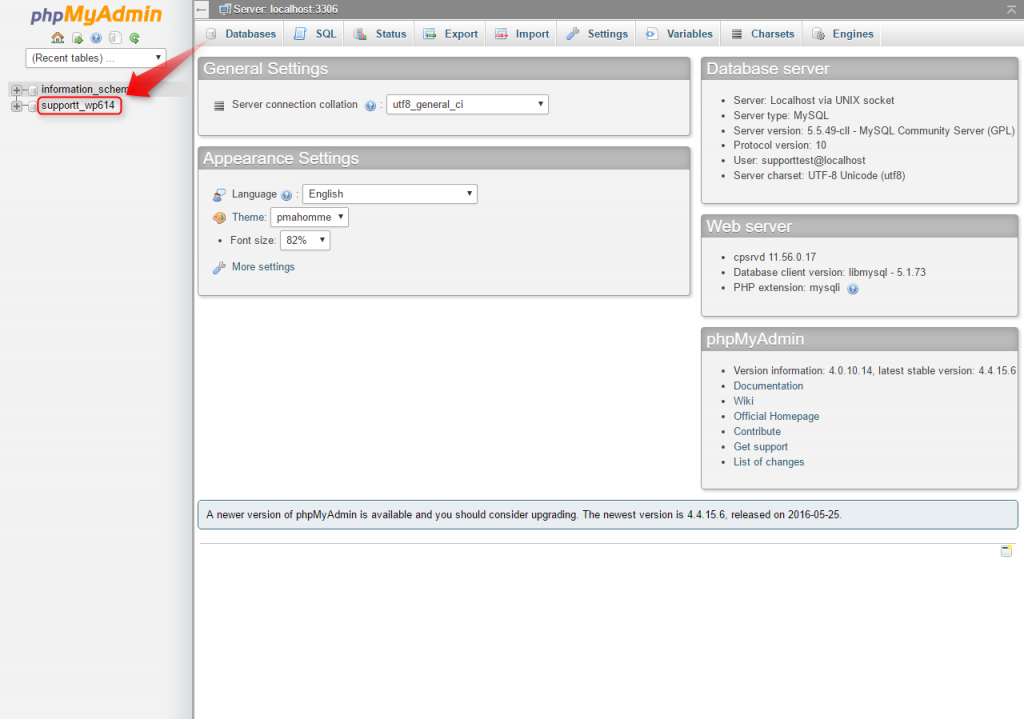
2. Select your WordPress database. (If you aren’t sure which database to select, check your wp-config.php file in the root location of your WordPress installation)
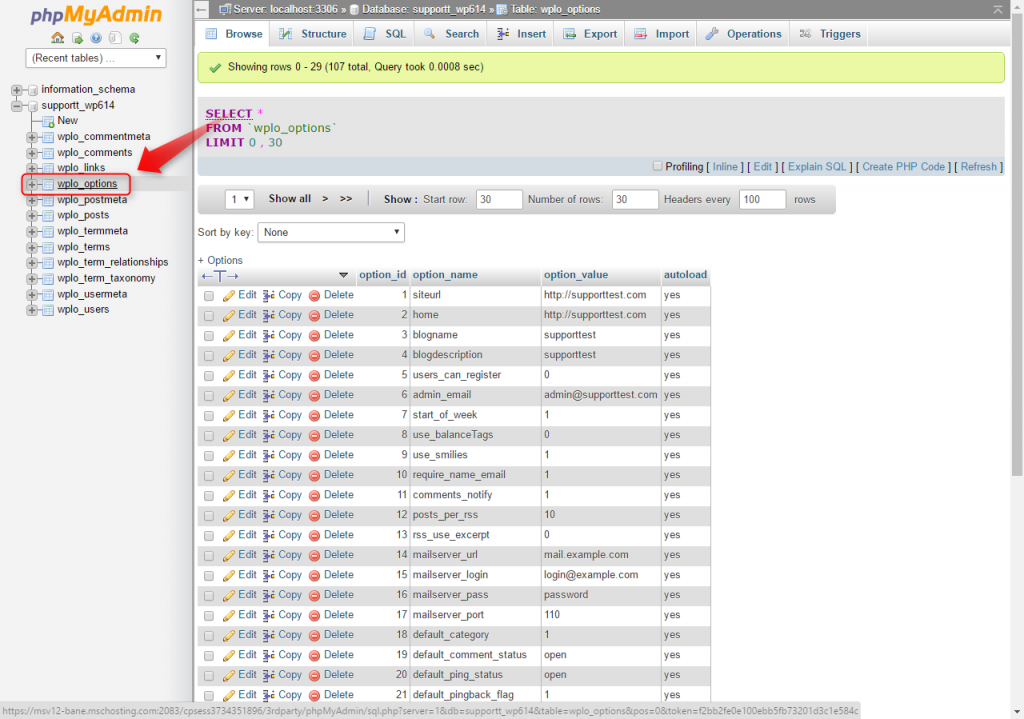
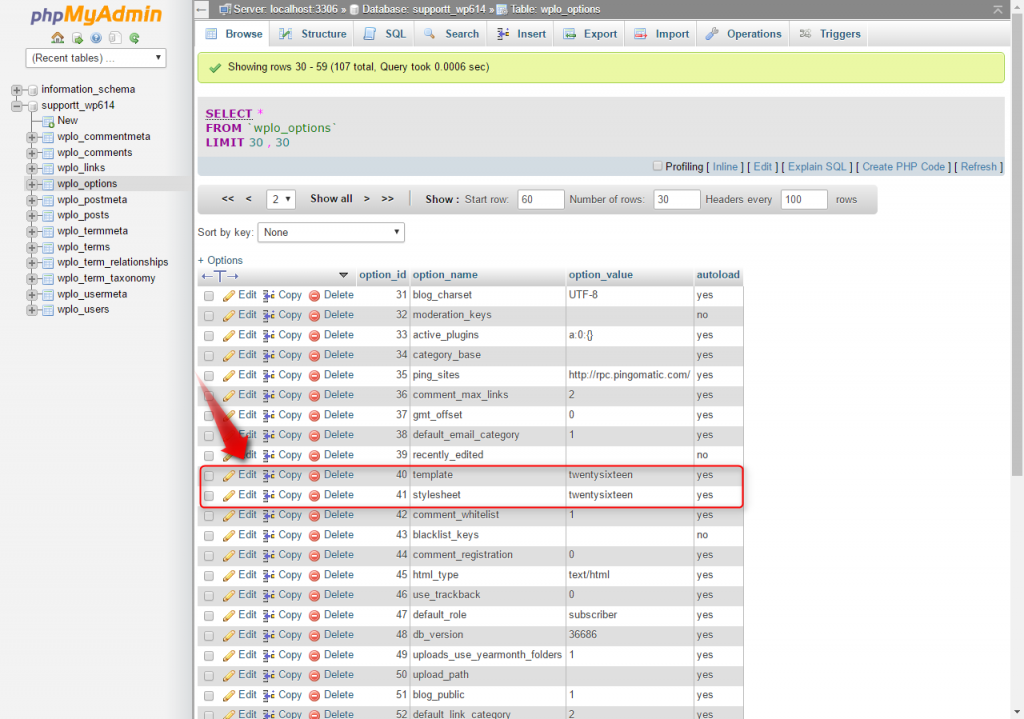
3. Expand the database and select the ‘wp_options’ table. (if you have another table prefix ‘tableprefix_options’)
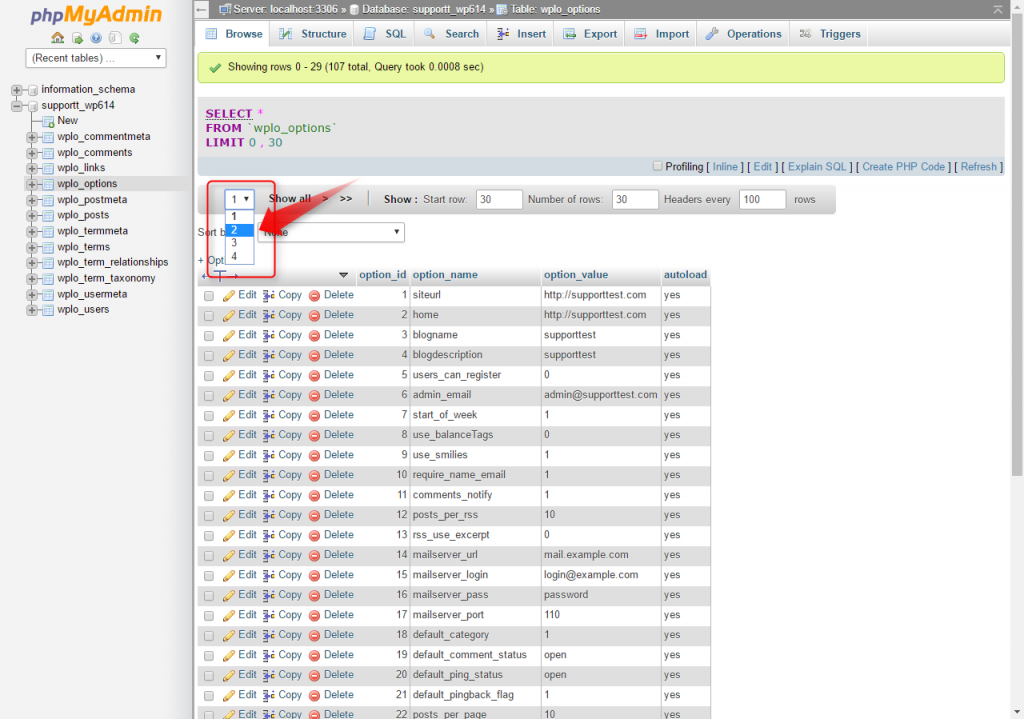
4. Select page 2 from the tables header.
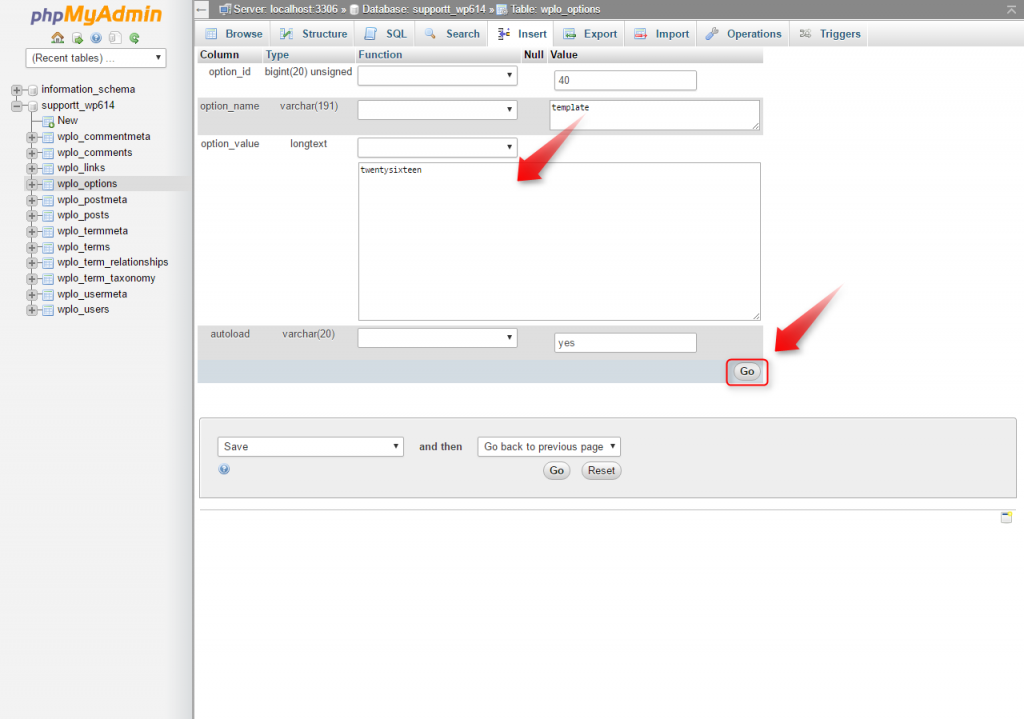
5. Now you’ll need to click ‘Edit‘ to make change on the ‘template’ and ‘stylesheet’ rows.
6. Insert in the name of the template you wish to assigned to the WordPress and press “Go” when you are done as per below.
7. Repeat the same step 6 for the other row and that’s all. You’ve completed the changes. May clear cached and brows your WordPress site now to check on it.