How to setup email account in Microsoft Outlook 2013
1. Launch your Microsoft Outlook 2013.
2. From Top left menu click FILE. From Account Information, click “Add Account”.
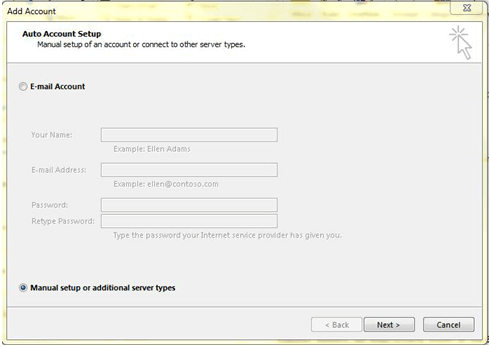
3. Check the “Manual setup or additional server types.
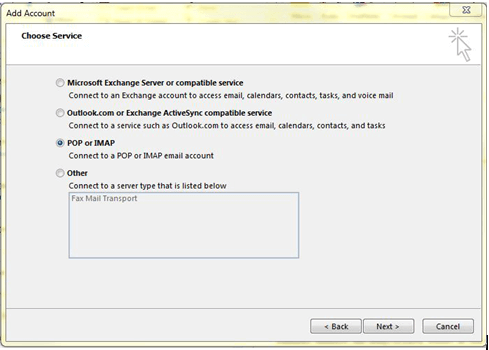
4. Check the POP or IMAP.
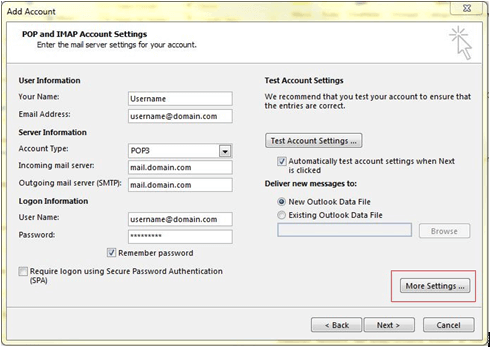
5. Enter your name and full email address in the User’s Information section.
6. Select Account Type. You may choose either POP3 or IMAP as we support both email protocols.
7. Enter mail.domain.com for incoming and Outgoing mail server (SMTP) mail.domain.com
8. Then assign your full email address and password on the Logon information section and check on to remember the password.
9. Then click on the More settings… as below screenshot.
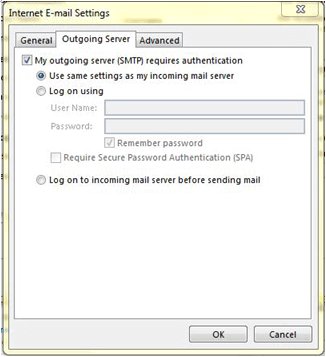
10. Then go to the Outgoing server tab to check on My outgoing server (SMTP) requires authentication as it is our current mail server policy to allow sending from mail clients.
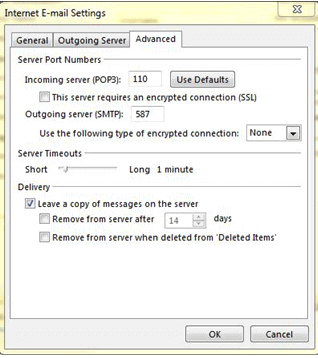
11. Go to the Advanced tab and change the Outgoing server (SMTP) port from 25 to 587.
12. Check the box “Leave a copy of messages on the server” if you wish the server to keep your email as a backup. Click the OK button.
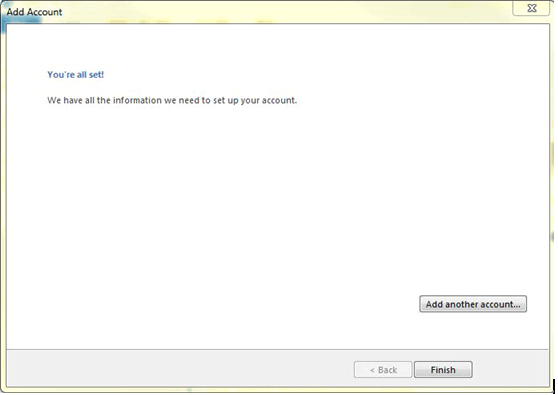
13. Click Finish and your email account in Microsoft Outlook 2013 is ready to use.
You may learn how to fix an email that has become stuck in the Outlook Outbox by going here. For more information about Email Hosting, you can also check out our Knowledge Base.

